Background mini-story
So I purchased Revlon ColorStay (Oily) in shade Early Tan a while back. The color seemed fine when I tried on the tester under those bright lights (sigh) and the color itself in the container looked like the color of my skin but when I got home and tried it again...BAM my face turned red ok....T^T
I was so sad because the foundation does not cause me additional break outs, does not make my skin even more oily and yasss, I liked it. Because the color was way off (and I didn't want to spend more $$ on another shade), I'd stopped using it after 2 weeks of struggling to make it work.
Finally, I found this youtube video
https://www.youtube.com/watch?v=zDgGadauBO0
and I decided to try it out!!
For those of you who didn't bother to watch the video: The girl said she used gel food coloring (I think) and she recommends using lemon yellow instead of yellow (I think) for a better result.

- Well, I couldn't find any gel food coloring so I got liquid food coloring.
- This brand was the cheapest I could find so I got these two HAHA
- I can't remember the exact price now, but it was no more than Rm 3 each.
- Because (I think)the girl said lemon yellow was better than yellow, I got 2 colors: orange and yellow...because if I mix these 2 colors together...I'll get lemon yellow right...

Left: orange Right:Yellow
Question: Why is the yellow food coloring darker than the orange food coloring?!
Yellow=(supposed to be)lighter than orange

AH yes. The girl also said the tools you'll need are
- container (to mix the foundation in)
- those q-tip sticks
- BUT let me tell you, instead of cutting off (and wasting) a bunch of q-tips (I'd soon realized), I could just use a ear pick (seen in the photo, blurred in the back) HAHA! It's kind of like a mini spoon, and you can use it to scoop the food coloring into the container. It's also easy to clean, you just wipe the food coloring off of it after each use (which I didn't btw, I just dipped it in both colors back and forth, what's the biggie?)
Here in the photo above, you can see the difference already!!
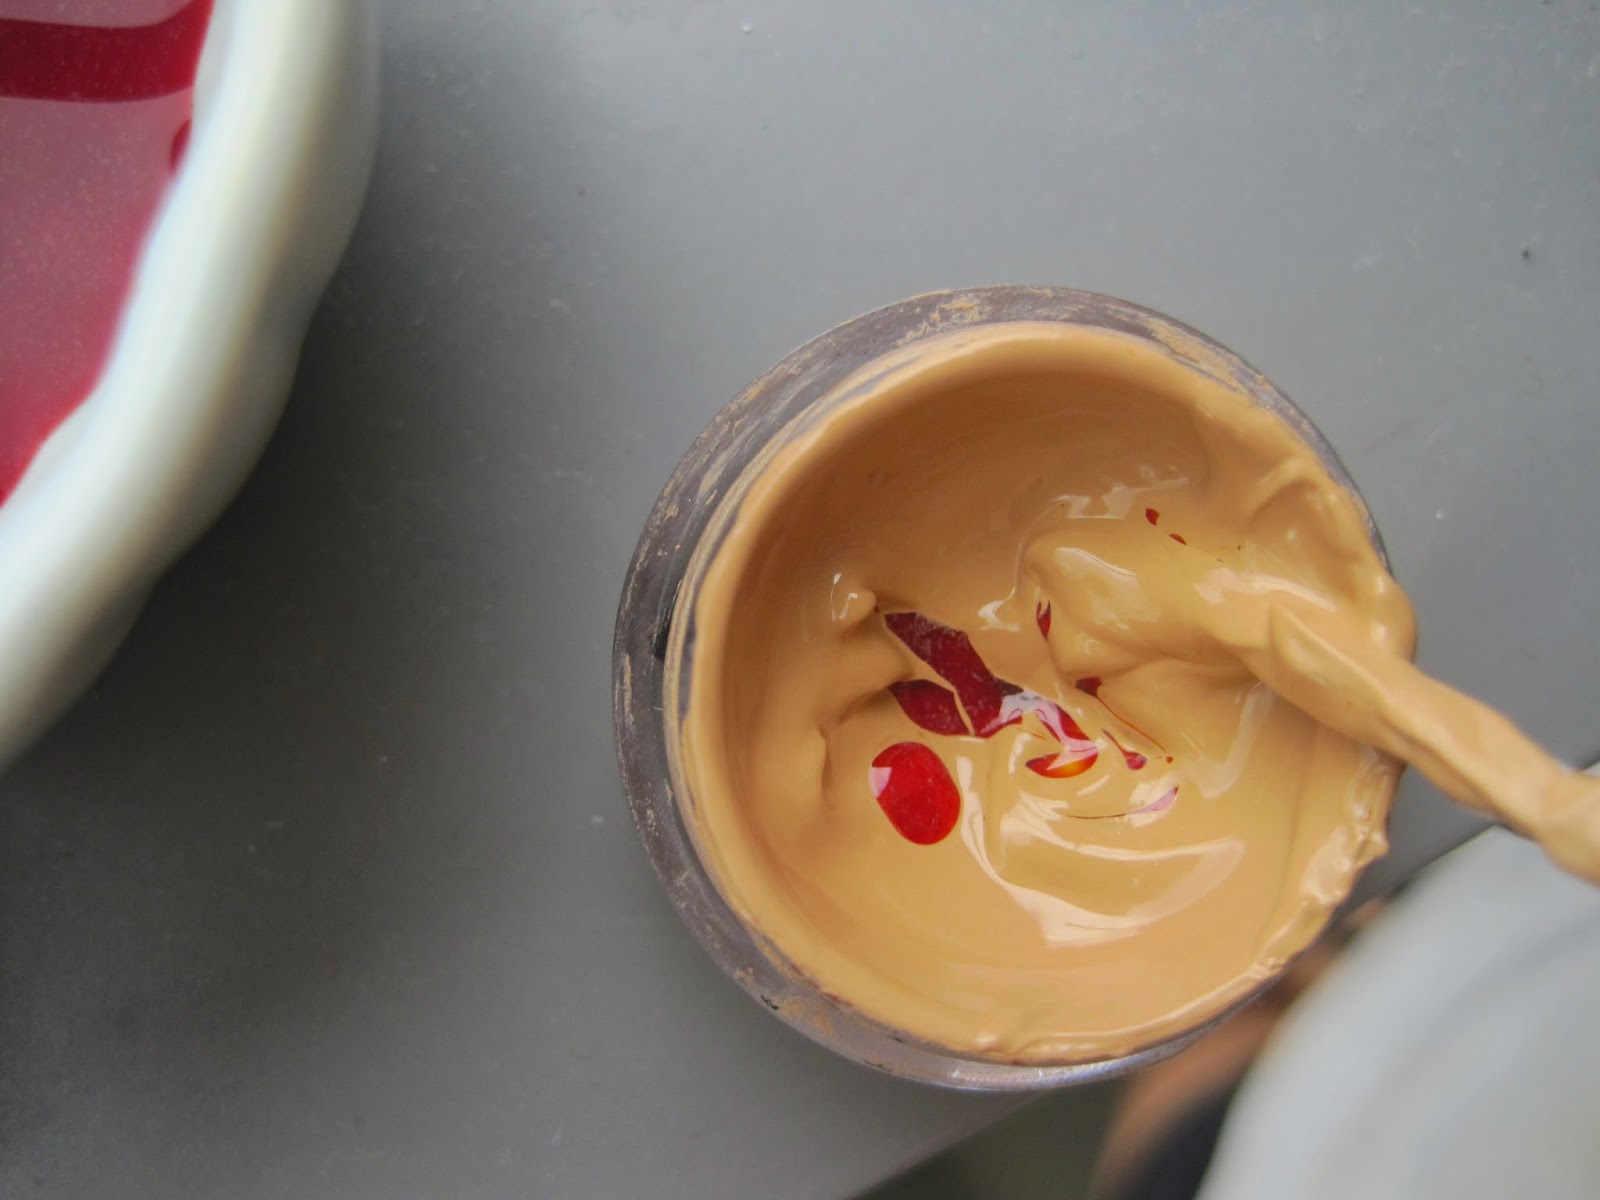
The lighting is off--the foundation really isn't that yellow in real life.
- After trying it on my face, I could tell that it was still a bit too pink for me, so I just added more orange and yellow food coloring in.
- I didn't add in the colors in ratio 1:1
- I just put in, whatever, sometimes 2 spoonful (using the ear pick) of yellow food coloring and one spoonful of the orange food coloring, you know.

Final result
Left: with food coloring
Right: Original
Conclusion
- The final color is still a tad pink-toned, but it is SO much more closer to my skin color than the original color. This method really works!
- The final color is actually a bit darker than I'd like it to be. When I apply it on, my neck looks kinda pale compared to my face. So now I'll have to use a lighter powder to adjust the color a bit.
- I think it's best to watch the video for yourself incase I missed out on any details: https://www.youtube.com/watch?v=zDgGadauBO0
P.S.S. I have Makeup Forever Full Cover Concealer #7, the sephora chick told me it is the most yellow-toned shade and still...it's too pink-toned for me WHY!
No comments:
Post a Comment