Monday, January 18, 2016

Review: L'Oreal Paris Infallible Gel Lacquer Liner 0.08 oz

I got this product from target for around $9 

Basic liner brush


Ok. So I put the product to the water test. It is definitely smudge proof and water proof!!
I rinsed this streak of eyeliner on my hand under the tap water for a solid 20 seconds. The color did not run, it stayed on my hand pretty well. It slightly smudged, as you can see from how the liner kind of feathered out. But this is holding up really good for a gel liner, not to mention a drug store product!

I thought maybe it sat so well on my hand because the back of my hand, unlike my eyelids, does not produce oil. This means if you are someone with eyelids that don't get oily, this liner would stay really well on you. But my eyelids tend to produce a bit of oil throughout the day and so...will this liner smudge on me?

The brush that comes with the set allows you to paint on a precise line, thin or thick. In this photo, I did a thick line and extended the line to a sharp finish.
After about 2 hours or so, the liner still looked sharp. The color lightened up a bit but I was impressed the wing stayed because usually the wing always smudge or something. 


What I like about this product
  • Creamy, smooth application
  • Brush gives good precision 
  • Very smudge proof--if you made a mistake it's best to remove it with makeup remover or it might be hard to erase.
  • Waterproof--not completely waterproof but it does a pretty good job!!
I would definitely purchase this again, a gel liner is so versatile. I can use this product to line my eyes or smudge it out for a different look. Sometimes I even use the excess product on the liner brush to fill in my brows HAHA!


Friday, December 4, 2015

Review: Rimmel Brow Kit Special Value VS Maybelline Eye Studio Brow Precise VS L'Oreal Brow Stylist Sculptor

BROWS!!!

I picked up Rimmel's special value brow kit in the darkest shade for $6.99, Maybelline's brow pencil in Deep Brown for $7.99 and L'Oreal's brow pencil in Dark Brunette for $8.99.


Rimmel Brow Kit Special Value:
I don't like this product. I was hoping the gel could help control my brows or at least do something but it didn't do anything at all. USELESS. 
The color of the brow pencil is not 'Dark Brown' even though that's what it says. It's more of a light brown or brown. 

Maybelline Eye Studio Brow Precise:

This brow pencil is waxy. The application process is always smooth as a result of the texture of the brow pencil. What I like about this product is that it doesn't matter how hard you press the brow pencil against your skin, the color will never be too harsh and if it does end up being too harsh for you, the spoolie could easily get rid of the excessive product by blending the product out nicely. I like how I am able to control the color I get out of this brow pencil--if I use it gently, the color is going to be light and if I relax my hand and just go for it, the color is going to be of a dark.
One thing I hate about this brow pencil is that the product is too soft. I use this brow pencil daily and I literally have to sharpen this brow pencil every 3-5 days. Because of how soft it is, when you sharpen the pencil the product will break off if you are not careful.

L'Oreal Brow Stylist Sculptor :

The L'Oreal brow pencil I got is the most expensive out of the three but it works the best. The color is satisfying--actual dark brown. The product is not so soft that it breaks off when you sharpen the pencil but not too hard that you feel like you are dragging the pencil across you brows. 
I was excited to see if the wax works but it doesn't. It is as useless as the Rimmel brow gel above. 

Rimmel Brow Kit Special Value
Pros: cheapest of the three
Cons: Brow gel does not work. Product is the least smudge proof of the three. Product is medium/light brown with an slight orange tint which is not the Dark Brown it claims to be. Not waterproof or smudge proof. Also color tends to fade off easily. 

Maybelline Eye Studio Brow Precise
Pros: It is very blend-able and soft so besides of using it as a brow pencil, I am able to use it as a bottom eyeliner and sometimes I even use it as an 'eyeshadow' and blend the color out on my lids for some definition around the eyes. The spoolie on this brow pencil works the best of the three. 
Cons: Product finishes WAY TOO QUICKLY. I finished more than half the brow pencil in just a little over a month. The color is just a shade darker than Rimmel's brow pencil so I would say this 'Deep Brown' is really just brown. 

L'Oreal Brow Stylist Sculptor 
Pros: Color is pigmented. Can also be used as an eyeliner. Does not smudge that easily compared to Rimmel's Brow Kit Special Value. Color is dark brown like the packaging says. Does not need to be sharpened frequently. I sharpen it maybe once every 1.5-2 weeks
Cons: Half the brow pencil is of brow wax and the wax is useless. Spoolie does not work as well as Maybelline's Eye Studio Brow Precise's spoolie--it can not blend brow products as well as the Maybelline spoolie.


Monday, October 12, 2015

Review: Seton Hall University

As senior year was gradually coming to an end, I was getting frantic--because I had absolutely no clue where I should go for college.

I didn't have a dream school. I didn't like any particular place. All I knew was that I wanted to establish a career in the fashion industry...but as what? A fashion designer? Market merchandise? Personal shopper? People always tell you if you have a passion for something, you should go after it. Get a job you enjoy and you will never have to work for a single day. But honestly, to actually go after your dream is terrifying. At least for me it was. Mainly because I have no connection in the fashion industry. I have no experience, and with all the competition, someone more knowledgeable than I am in the field could easily take me down and take the lead and I could be a hundred feet behind them, panting, trying desperately to catch up but failing to do so. Yes, we all want to pursue our dreams, but I also need to be able to support myself financially with my career, and the fashion industry could leave me hungry and homeless. Because of my internal struggle, I ended up choosing Seton Hall University for my first year of college.

It wasn't hard choosing Seton Hall University--because I had no dream school and I decided that I wasn't going to attend a fashion school since I was afraid of the risks, I went for the school that gave me the most finical aid and went for majors that had potentials.

All I knew before my official move-in day about SHU was that it was located in New Jersey, 15 miles or so from New York City and that New Jersey gets reaaaally cold in the winter. When freshmen move-in day arrived, I packed my luggage, grabbed my passport and headed off to the airport.

After 16 hours of flight, I finally reached John F. Kennedy International Airport (I'm an international student btw). After I exited the airport, I hopped into a cab and got dropped off at SHU in front of my dorm (Aquinas) for 160 bucks.

SHU definitely didn't impress me at first sight, in fact, I'd hated it. I've never lived outside of a city before and South Orange, New Jersey was way. too. much. for me. The airport to SHU was about one and a half hours (there was traffic) and I was exhausted and hungry. As my cab was closely approaching my destination, I realized there were no buildings around me, only small, ratchet-looking houses. The area was plain, dull and lifeless. And it really, really didn't help when my cab driver said 'ooh looks like there are a lot of ____ people here'.

Long story of my first impression of SHU short, I basically felt very upset...I felt lost, confused, lonely and was actually a tad scared when I'd first reached SHU. I think it was because I reached SHU around midnight and the campus looked really empty and dark and I was just overwhelmed.

Blah blah blah, sorry for talking so much. I will now list out some things I'd learned so far about SHU.

  1. In my opinion, the campus is rather small compared to public universities and other private schools. You most likely won't get lost and will be able to find your classrooms fairly easy. At least...for me it was! 
  2. My cab driver drove through East Orange to get to SHU. East Orange is a ratchet neighborhood(seriously). The campus is located in South Orange, a clean, pretty and safe town.
  3. The Aquinas Hall is the newest co-ed residence hall on campus. It is a lot better than Boland, the other co-ed residence hall for freshmen. In Aquinas you'll have bathroom in your dorm to share with your roommates and suite-mates, in Boland, you don't have private bathrooms. The cost to live in Aquinas is higher than it is to live in Boland. But this is just because Aquinas is so much nicer. 
  4. Textbooks are expensive. If you are sure about taking the classes you've registered, try to buy the textbooks from eBay or Amazon at a cheaper price or better, see if they are available in the library to be checked out first! You could also rent the textbooks from the bookstore but still...it'll cost you around $100 to rent (per textbook) anyways so that's still a lot.
  5. I know I said get the textbooks beforehand but some professors are so annoying. They tell you to buy the textbook but never assign anything from it! Instead, they make you purchase another thing called the 'Web Assign access code' from the bookstore and assign work there. So be careful. Don't waste money. 
  6. There's this religion course called 'Journey of Transformation' and you have to take the course in order to graduate from SHU. All freshmen are assigned this course I believe. However!! If you are planning on transferring, do try to drop the course because unless you are passionate about religion or your career might require knowledge on religion,  it really, honestly, is a waste of time. Not to mention the Journey of Transformation book is around a hundred dollars and you won't find the same edition on eBay or Amazon as it is a SHU edition book.  
  7. If you are an international student and took the IB exam and passed, you'll need to make sure the registration office receives the transcript before the add/drop date or you won't get credit even if you tell them you can show them the scores online on the official IB website. 
  8. If you are planning on taking the art 2D/3D course, you'll need to know that this course requires students to buy their own art supplies, which will cost you around $130-160 collars. It's weird because SHU charged me $25 art supply fee and I paid (it's included in my tuition cost). What's the $25 fee for then, SHU??! 
  9. There really isn't anything to do around SHU because it's not a city. You could go to the frat parties that happen on Thursday nights, Friday nights and Saturday nights. Once you get to know people they might invite you over to apartment parties. Idk. Life is pretty boring here tbh. There's no football field either so no football games. 
  10. You could always head to NYC by taking the NJ transit. The NJ transit is about a 12-20 walk from campus. The train ride is about 35 minutes I think and you'll find yourself in the city.
  11. SHU provides this transportation called the SHUfly. It's basically a free shuttle that takes students around the town. On Saturdays the shuttle goes to the mall and on Sundays the shuttle goes to Target. 
  12. Always pay with electronic routing or something on your busar account. Never choose to pay with credit/visa/mastercard or whatever. If you don't choose to pay with the electronic routing thing then you will be charged with $400 or more of service fee or something. That happened to me. 
  13. You won't be needing to bring your own laptop. You will be obligated to pay a certain amount of fee for the school assigned laptops($650 per semester I believe). The assigned laptops aren't bad. They are Lenovo and touch screen (the one I have anyways) but they are no MacPro. 
  14. As an incoming freshman, there is no way for us to register our classes by ourselves. There is this Pirate Adventure (I think that is what it's called) in June and that if you can make it, then you'll be able to register your classes then along with the rest of the students at Pirate Advendure. If you miss it and if you are an incoming international freshman then you must contact the freshman studies office, and they will connect you with an academic adviser to register for classes(remember, once the appointment is scheduled, you must call the office at the scheduled time, they won't call you). The number of the freshman studies office is 1-973-761-9740. If you are not an international student, the office will contact you. 
  15. If you register for your classes late...say, in July, you might run out of options. I was not informed by anyone that I had to call the office to register for my class and I had to figure out everything by myself. I ended up registering towards the end of July and by then most of the classes were full so I had limited options for example I had to take English at 8am and art 2D and 3D from 5pm to 7:30 pm. 
This is all that I can think of right now. Hope they help!! And p.s. the campus is very very pretty. It's very clean and so instagram-worthy. 

Thursday, April 30, 2015

How to: Make your foundation more yellow toned (really cheap way)

Background mini-story
So I purchased Revlon ColorStay (Oily) in shade Early Tan a while back. The color seemed fine when I tried on the tester under those bright lights (sigh) and the color itself in the container looked like the color of my skin but when I got home and tried it again...BAM my face turned red ok....T^T 

I was so sad because the foundation does not cause me additional break outs, does not make my skin even more oily and yasss, I liked it. Because the color was way off (and I didn't want to spend more $$ on another shade), I'd stopped using it after 2 weeks of struggling to make it work. 

Finally, I found this youtube video

https://www.youtube.com/watch?v=zDgGadauBO0

and I decided to try it out!! 

For those of you who didn't bother to watch the video: The girl said she used gel food coloring (I think) and she recommends using lemon yellow instead of yellow (I think) for a better result. 


  1. Well, I couldn't find any gel food coloring so I got liquid food coloring. 
  2. This brand was the cheapest I could find so I got these two HAHA
  3. I can't remember the exact price now, but it was no more than Rm 3 each.
  4. Because (I think)the girl said lemon yellow was better than yellow, I got 2 colors: orange and yellow...because if I mix these 2 colors together...I'll get lemon yellow right...


Left: orange Right:Yellow
Question: Why is the yellow food coloring darker than the orange food coloring?! 
Yellow=(supposed to be)lighter than orange


AH yes. The girl also said the tools you'll need are
  • container (to mix the foundation in)
  • those q-tip sticks
  • BUT let me tell you, instead of cutting off (and wasting) a bunch of q-tips (I'd soon realized), I could just use a ear pick (seen in the photo, blurred in the back) HAHA! It's kind of like a mini spoon, and you can use it to scoop the food coloring into the container. It's also easy to clean, you just wipe the food coloring off of it after each use (which I didn't btw, I just dipped it in both colors back and forth, what's the biggie?) 
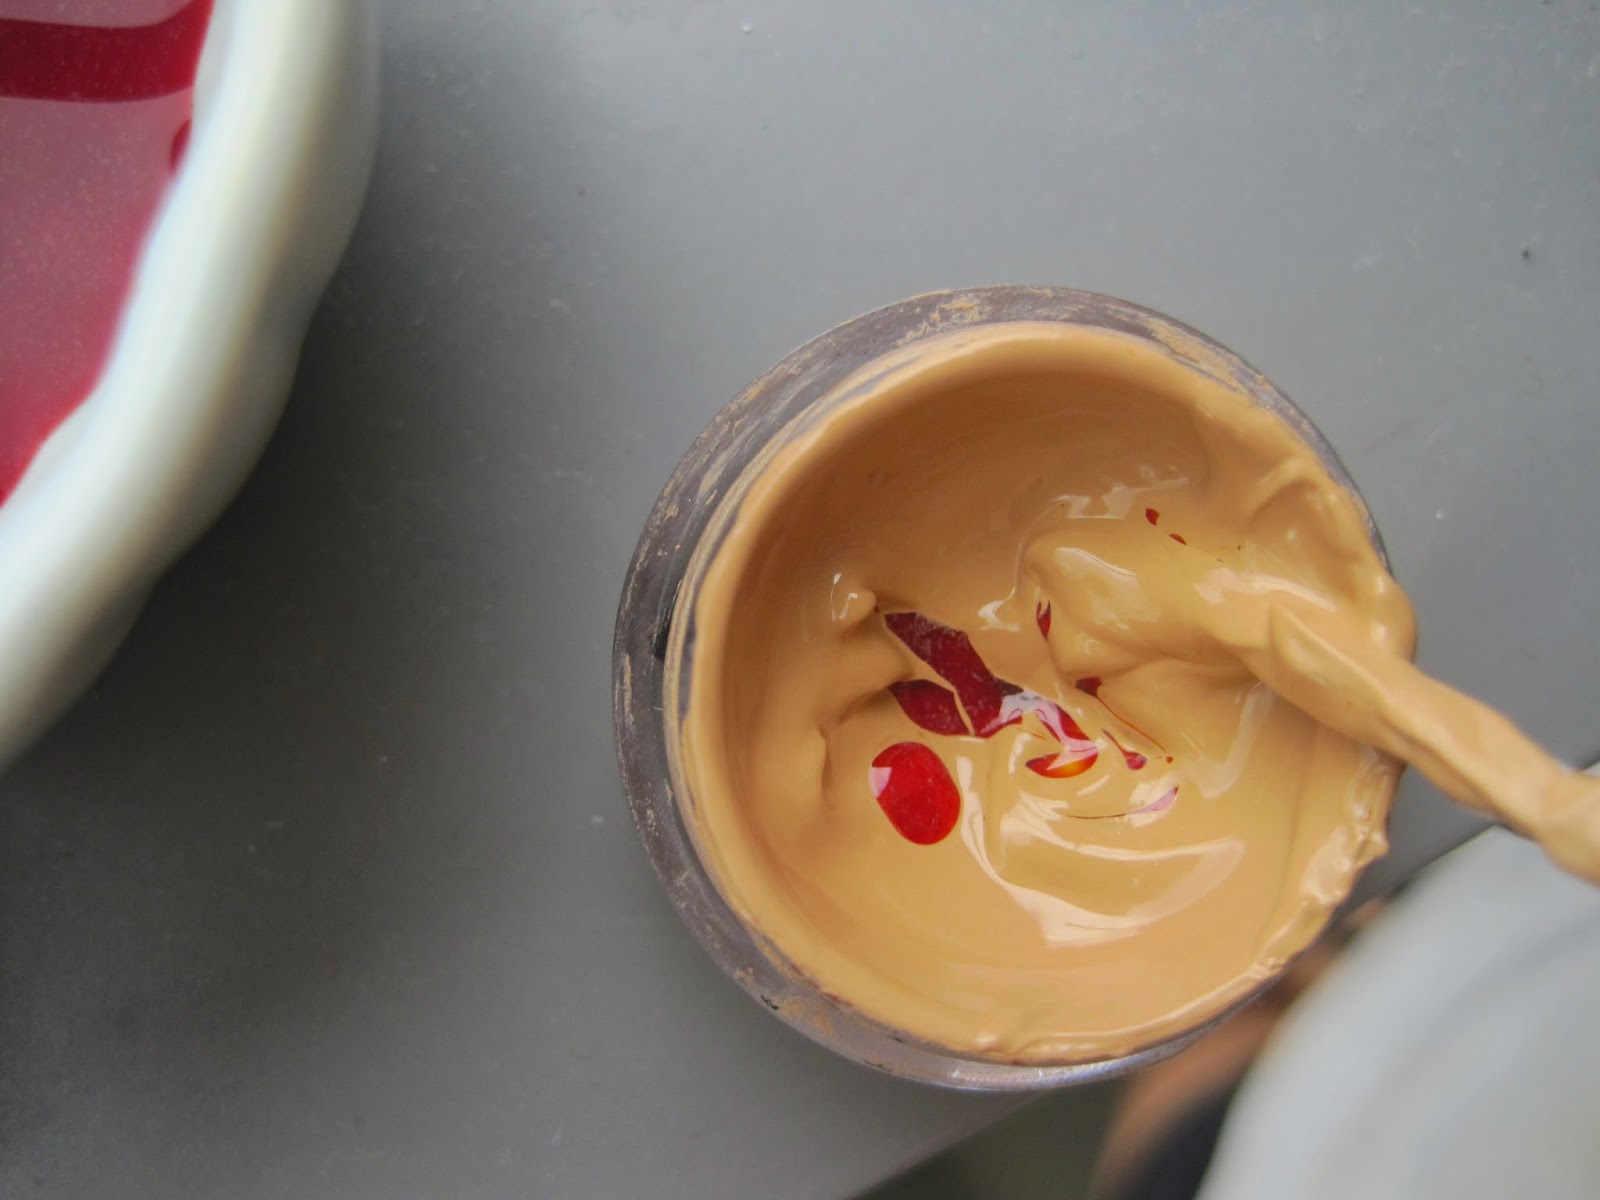
Here in the photo above, you can see the difference already!!


The lighting is off--the foundation really isn't that yellow in real life. 
  • After trying it on my face, I could tell that it was still a bit too pink for me, so I just added more orange and yellow food coloring in.
  • I didn't add in the colors in ratio 1:1 
  • I just put in, whatever, sometimes 2 spoonful (using the ear pick) of yellow food coloring and one spoonful of the orange food coloring, you know. 


Final result
Left: with food coloring 
Right: Original
Conclusion
  1. The final color is still a tad pink-toned, but it is SO much more closer to my skin color than the original color. This method really works!
  2. The final color is actually a bit darker than I'd like it to be. When I apply it on, my neck looks kinda pale compared to my face. So now I'll have to use a lighter powder to adjust the color a bit. 
  3. I think it's best to watch the video for yourself incase I missed out on any details: https://www.youtube.com/watch?v=zDgGadauBO0
P.S. I tried this method with my Makeup Forever Full Cover Concealer and it works as well
P.S.S. I have Makeup Forever Full Cover Concealer #7, the sephora chick told me it is the most yellow-toned shade and still...it's too pink-toned for me WHY!


Saturday, April 18, 2015

Review: Ampang Point Eyelash Extensions (My Image Holistic Beauty Centre)


Got my eyelash extensions done here
RM 138 first trial for the 'natural sets'
I believe the first trial price for the 'dramatic sets' is Rm 158 or 168 or 178

SO. This is my second time getting eyelash extensions. I had my first lash extension experience at Sungei Wang plaza. 
I went into a ratchet 'beauty salon' in Sungei Wang (literally no doors, not even a room, just a small open space with curtains set up and all that...) and had them done for Rm 89. 


This photo was taken right after I got them done (at ampang point)
I'd say it's best to get your lash extensions done at night/late afternoon once you've showered and cleansed your face. 
The  RBS (ratchet 'beauty salon) told me I couldn't get my eye area wet for the next 12-24 hours after the extensions are done, for the glue to fully set. 
My Image Holistic told me I had to wait 2 hours 'til I could wash my face (including eye area)
I felt totally dubious hearing that....from 24 hours to 2 hours?! 
Anyways I waited for a day to wash my face after I got them done at My Image Holistic, just to be safe. 

Procedure & Process/My notes
  • The extensions are much more natural at MIH (My Image Holistic) than RBS because they are much thinner and sharper, more similar to our real lashes, however, still not the best extensions :P They are much more light weight compared to RBS lash extensions. I remember when I was done with my extensions at RBS, my lids felt so odd because of the weight.
  • People lie. Both MIH and RBS told me that the extensions would stay in place for a month or two depending on how I took care of them. NO. The extensions I got at RBS was completely gone by the end of the second week. The lady at MIH was kind enough to tell me (although after I'd gotten them on) that because my lashes are very soft and thin, they are not strong enough to really hold up the extensions, and so maybe 2 weeks max? 
  • The glue used at MIH is much better than the one used at RBS!! I can tell because not only could I get my extensions wet after just 2 hours, but I cried like 3 times right after the MIH lady told me I was done because as I opened my eyes, the glue on my left eye was still drying and it stained my eye a bit ok. I thought the tears would make my extensions come right off but they didn't. MIH extensions lashed me up to 3 weeks but by the 3rd week I had barely no extensions on. 
  • MIH is more professional (duh...more expensive too and it's a place with actual secured doors and all that) and the process of getting them extensions on took about 1 and a half hours. That made me feel better because from what I've researched, 1.5 hours and 2 hours is usually the time the process of getting lash extensions should take. In RBS, it only took 30-35 minutes.........
  • Better service at MIH! I had 2 ladies do my extensions (one left for her dinner break....so very professional huh) and so one eye looked better than the other and so I had the second lady readjust/reshape some parts of my extensions on one eye. She was very patient and did what I asked her to do. At RBS, the lashes came out so unnatural looking (too long and dark, like huge spider legs ok) and I was like to the lady 'c'mon I asked for a natural look'.... she just grabbed a pair of rusted old shears and cut off the bits of extensions that were sticking out too far.....thanks
  • One thing I regretted not doing at MIH: I should've told the lady exactly how I wanted my extensions to look like: longest ones at the end of my eye for a cat eye look instead of having them in the middle, for a doll-like look. The lady didn't ask anything and decided herself to go for the doll like look because she thought she'd just follow the shape of my natural lashes (middle=longest) :/ By the time I'd told her what I'd wanted it was too late. Sigh
  • But honestly though, MIH doesn't offer the best. I realized it doesn't matter in the end whether or not I'd gotten a cat eye look or a doll eye look, the look would probably be the same. The extensions used at MIH were the same length, there wasn't much of a transition/build up. Maybe MIH doesn't have various lengths of extensions to use to create looks? 
  • I feel like I've been tricked. Before I'd gotten the lash extensions, I MIH show me the lashes they were going to use: super super natural looking. Thin, soft-ish, individual. But when I was done and looked at the extensions, they were much more bulky, about 3-4 extensions glued together (it appears) and then glued on to my lash line, they weren't the lash extensions they told me they were going to use. :/


-Almost 3 weeks, my left eye, MIH extensions-
The lashes did not cause a problem at all, i.e. falling off and into my eyes , I wore them with contacts too. 

The first extension fell out by the 2nd week.

Here you can see what I mean by 3-4 lashes glued together and then glued to my lids....yeah?

The extensions are weird and they stuck out oddly . This would be the right time to go back to MIH and get a refill but...nah, not worth the money. 


-My right side after 3 weeks-
Here you can see the bulky extensions even more clearly!! (RBS extensions were much more bulky and fake than this btw)
As you can see, the extensions are being placed on to my lashes and not my lash line...are you supposed to glue the extensions on to your lashes or your lash line?! 
I guess this is what the MIH lady meant by saying because my lashes are thin and weak, the extensions won't last long (cos she was going to glue extensions on to my lashes). 
BUT. I'm sure extensions aren't suppose to be glued on to your lashes (right? I researched) !! This makes me doubt MIH of their skills and techniques. 

By the 3rd week I'd started to wear non-waterproof mascara so I could brush the extensions in place and into the right directions and add more volume to them. I used oil based makeup remover which you're not suppose to use on the extensions but whatever, I don't wanna buy a new makeup remover just for this and the extensions were looking like crap anyways.

Here is a pic of the extension...with few of my lashes ripped off!! I realized every time the extension came off, it'd take 1-3 of my own lashes with them, because the lady glued them onto my lashes :'(


Do you see that empty, bald spot and those thinning areas? Yea...thanks a lot extensions

I couldn't take it anymore....right before I was going into my 4th week with the extensions, I went back to MIH and had them removed. Because there were only a few extensions left, the lady only charged me Rm 20 for the removal. 
She was so kind and gentle with my poor lashes T^T

Overall my experience with MIH lash extensions=average. I wasn't loving it, wasn't hating it as much as I should because I hated my experience at RBS more. I wish the extensions came out more natural (no bulking extensions please) and my own lashes did not get ripped off LOL 

I'm happy they lasted for 3 weeks although by the 3rd week they were super ugly and I had to use mascara.

I'm happy the lady at MIH was so kind. 


Would I get it again? Nope. 


Monday, March 9, 2015

Review: Heroine Make Long and Curl Masccara (Waterproof)

The packaging does not say that it's waterproof but...it is!

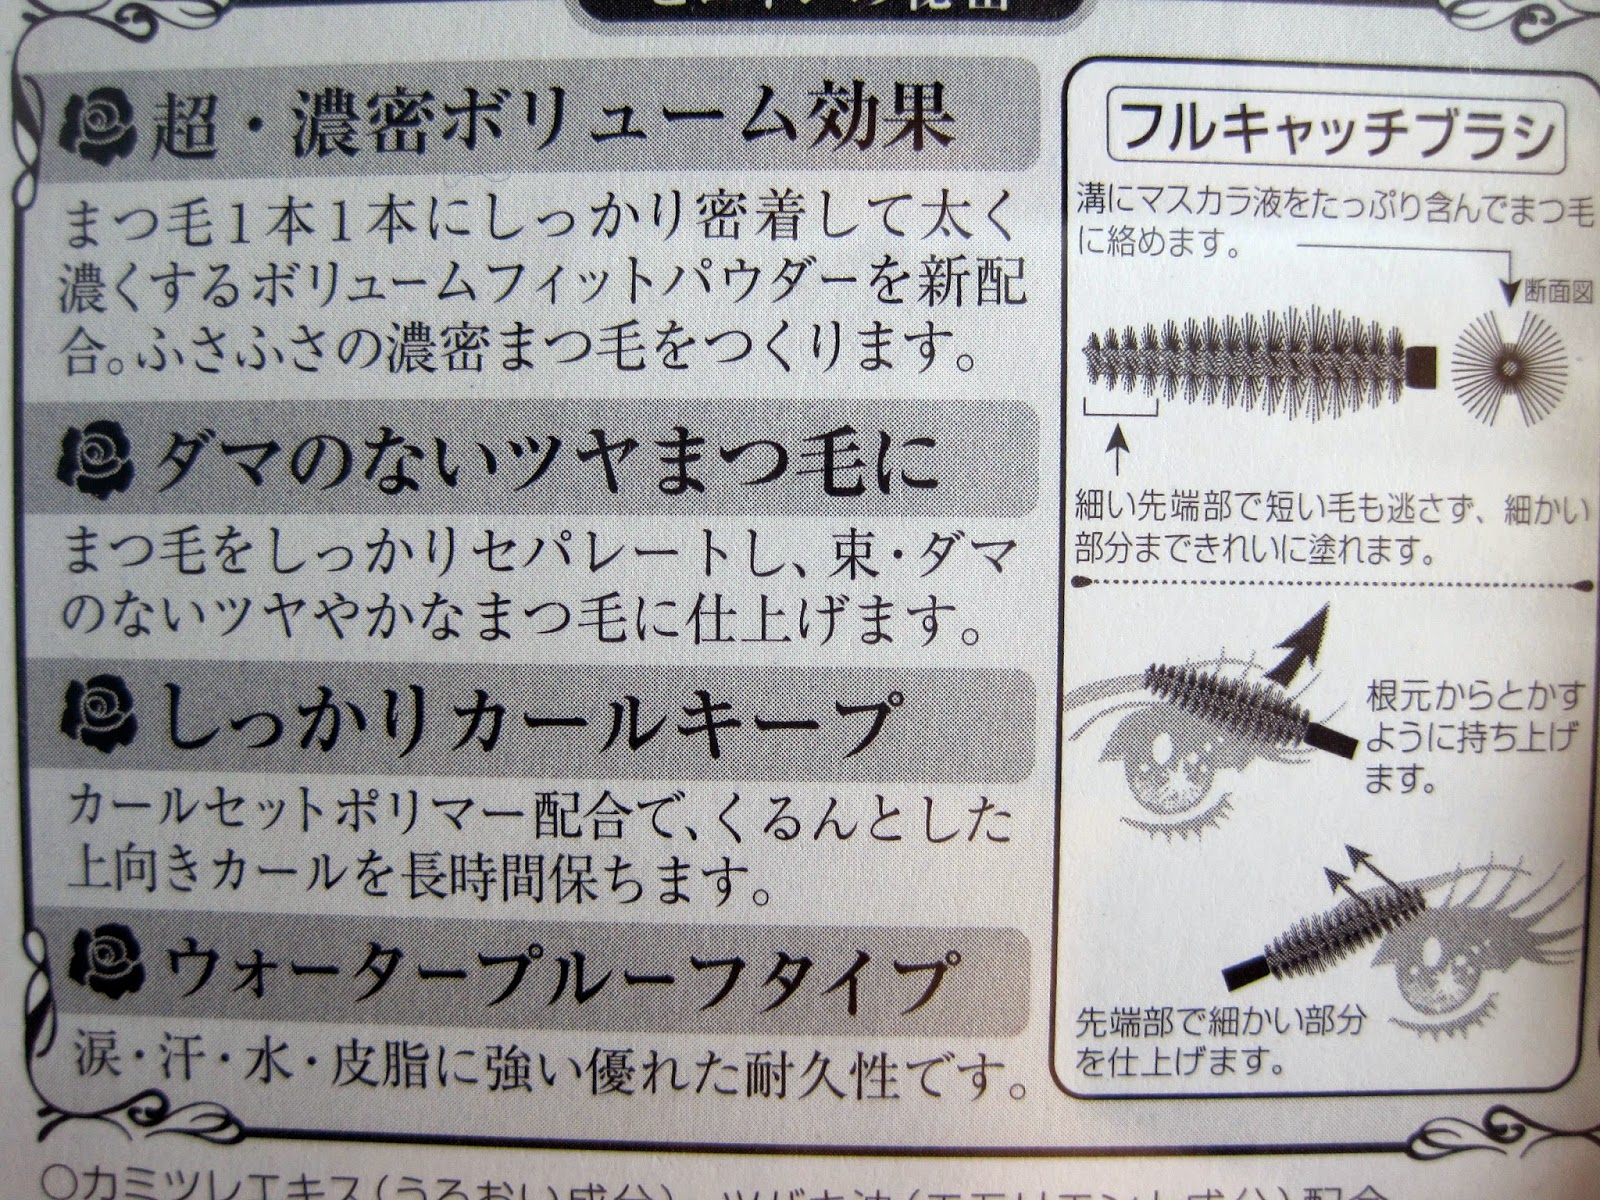
I have no clue what this says...
The size of the wand is medium-small I'd say!

The wand may look a tad big right now but it's actually quite flat and small (on the sides) and this will allow it to really get to those small lashes/inner corners.

This bristles are very hard and this will help the wand to really separate the lashes. But if you're not careful, you could hurt yourself! 

Curled lashes


One layer on top and I dabbed on a bit on the bottom lashes

2nd layer

After the 2nd layer I was a bit disappointed at how sparse my lashes looked but then I looked at my 'curled' photo and realized my lashes are super sparse to begin with haha and so this mascara actually did a good job!! 

It lengthened my lashes for sure and it volumized my lashes as well. I think because my lashes are just so sparse there was only so much this mascara could do!! 

After wearing this from 7am to 9pm, my top lashes didn't smudge at all and the curls (90%) stayed! My bottom lashes were smudge though, after around 4-5 hours and I suspect this is because I had a bit of foundation on my under eye area and whenever I use foundation/bb cream on my under eye area, the mascara (no matter how good) would smudge. So sad :'( 

So this mascara is super long lasting for sure!! But it's incredibility hard to get off--you'll need a good makeup remover to remove this (I personally use the oil-based makeup remover from Biore).  

This mascara dries super fast, like, it would dry seconds after you are done applying. The plus side to this is that you can blink basically right afterwards and not having to worry that the mascara will transfer on to the skin;  the down side to this is that any mistake/smudge will be hard to erase unless you have makeup remover/soap. I accidentally smudged the product against my skin when I was in a hurry and 25 minutes later, when I had time to fix it, I could not get the product off of my skin no matter how hard and how much I rubbed my skin! I had to use some soap I found in the bathroom to get it off. 

I quite like this mascara! One of my Maybelline mascara does not make my curled lashes stay and so I applied on this mascara first and then applied the Maybelline one for extra volumn and my lashes stayed in its curled shape!! Woohoo!! 

What I like:
  • Super waterproof
  • Doesn't weight down my lashes aka make the curled lashes stay
  • Super easy to use
  • Dries fast
  • Super smudge-proof (unless I got foundation/bb cream on)

What I don't like:
  • Maybe just how it's so hard to  get off without soap/makeup remover but whatever, I like how waterproof it is!


Saturday, March 7, 2015

Review: Schwarzkopf daily treatment spray

My hair was super dry (ends) and had an unbearable amounts of split ends. I really didn't want to chop my hair off and so I decided to give this spray a try


This spray did not repair my hair. 
I have been using this spray for almost 3 months now (twice a day, when I get out of the shower and in the mornings) and the condition of my hair stayed more or less the same. 

This spray did not cure split ends lol and the ends continued to be dry. 

What I like about this spray:
  • Smells really good so after using it your hair will smell good
  • Can untangle hair (If my hair is tangled up I'll spray it and the process of brushing my hair becomes so much easier)
What I don't like about this spray:
  • My hair didn't get any healthier and I purchased the spray in hopes that it will repair my hair, so this is a disappointment!